Page Format
Overview
The main screen of Abriska is divided into 6 sections:- Header – this contains who is logged into the tool and also a link to the user forum (Highlighted purple in Figure 1 - Abriska Layout).
- Breadcrumbs – this allows quick navigation between forms within Abriska (Highlighted orange in Figure 1 - Abriska Layout).
- Sidebar – always contains a list of buttons that changes depending on where the user is in the tool (Highlighted green in Figure 1 - Abriska Layout).
- Portal – this is the main content of the tool. This could display a report or a form on which to enter data (Highlighted dark blue in Figure 1 - Abriska Layout).
- Footer - this contains the Abriska version number and the copyright information. The footer is fixed at the bottom of every page. (Highlighted light blue in Figure 1 - Abriska Layout).
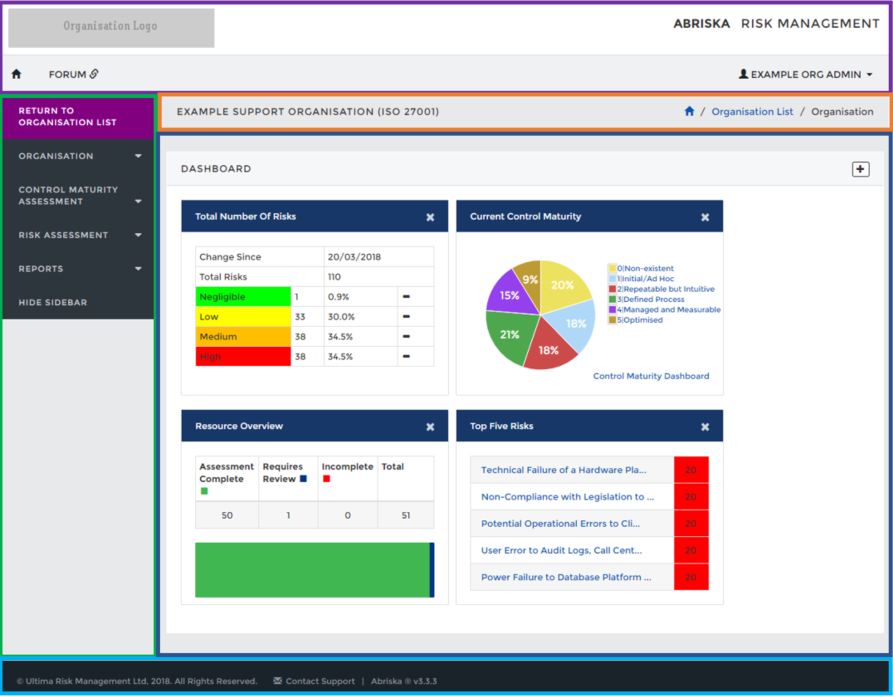
Figure 1 - Abriska Layout
Types of Screen
The following types of screen are utilised throughout Abriska.Hierarchy
Several of the information sets that are loaded into Abriska are hierarchical; which allows information to be stored in relational layers. For example, an organisation might be separated into different business units, then each business unit may be separated into divisions then finally a division might be made up of several departments. The best way to represent this data is via a ‘tree view’, commonly seen in Microsoft Windows Explorer.- Expanding the hierarchy - To view child nodes under a specific parent, click on the ‘plus’ next to the node.
- Collapsing the hierarchy - To hide the child nodes from view, click on the ‘minus’ next to the parent node.
Form
These screens allow data to be added, modified or deleted. All forms require either the ‘Submit’ button to be pressed or pressing enter on the keyboard after the data is modified in order to save. If you do not press either submit or enter and try to navigate away Abriska will warn you that you will lose your changes.Return to general